Uploading to Instagram or TikTok has become easier than making your morning toast.
You go to the respective app on your smartphone, select a video, write a caption, add relevant tags and then send it on its way.
With both Instagram and TikTok (and also YouTube Shorts) you can also create the reels themselves- compiling your own videos, adding effects, music and titles before hitting upload.
Therefore, you might be wondering why this article even exists when it all seems so simple and straightforward.
Well as with everything in life, there’s more than meets the eye.
Yes, you can simply select a video and upload it, but if you’re looking for the best quality output and maximum engagement, there are some good best practices to know and understand.
So let’s get started!
ASPECT RATIO + UI ELEMENTS
Instagram and TikTok are both designed for vertical display. Most articles online will say it’s a 9:16 aspect ratio, which is only partially true.
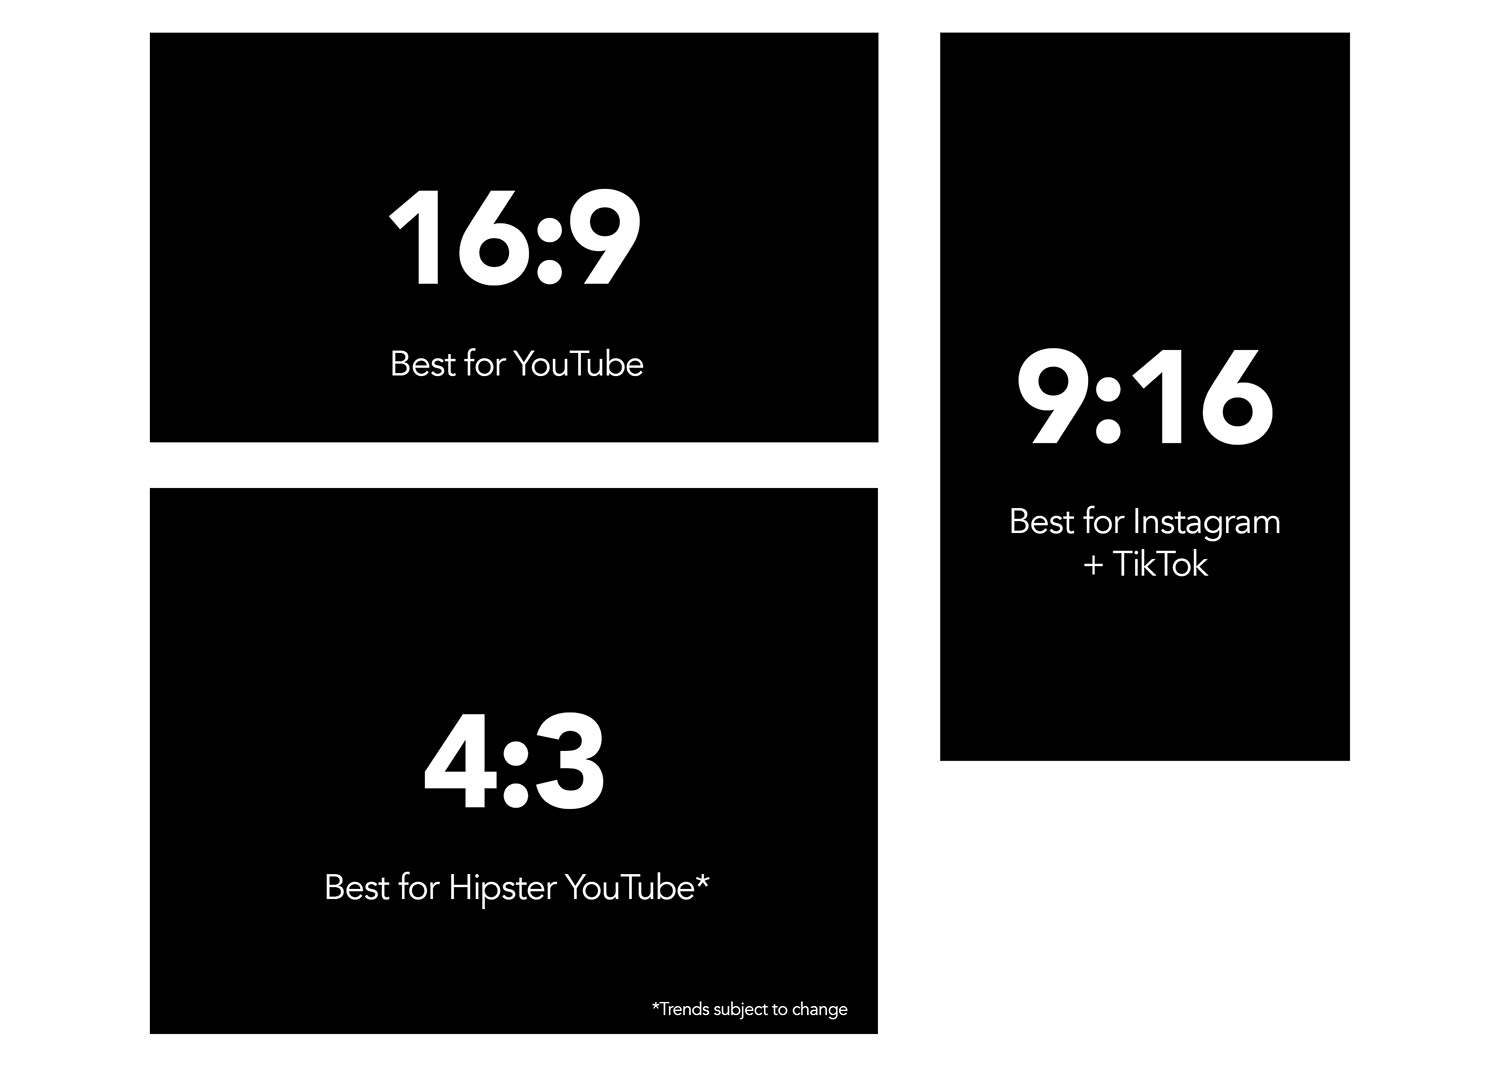 While you want to create and export content that is in 9:16, both platforms will resize the video for the respective display it’s been watched on.
Most newer iPhones (and other flagship brands) for example are actually 19.5:9, which is wider than 9:16. Instagram and TikTok will therefore crop in, losing some of the sides of your 9:16 video to ensure there is no blank space on the left and right of your content.
As mentioned, still keep your creating and uploading videos in a 9:16 aspect ratio but be aware when displayed on most devices, some of it will be cut off.
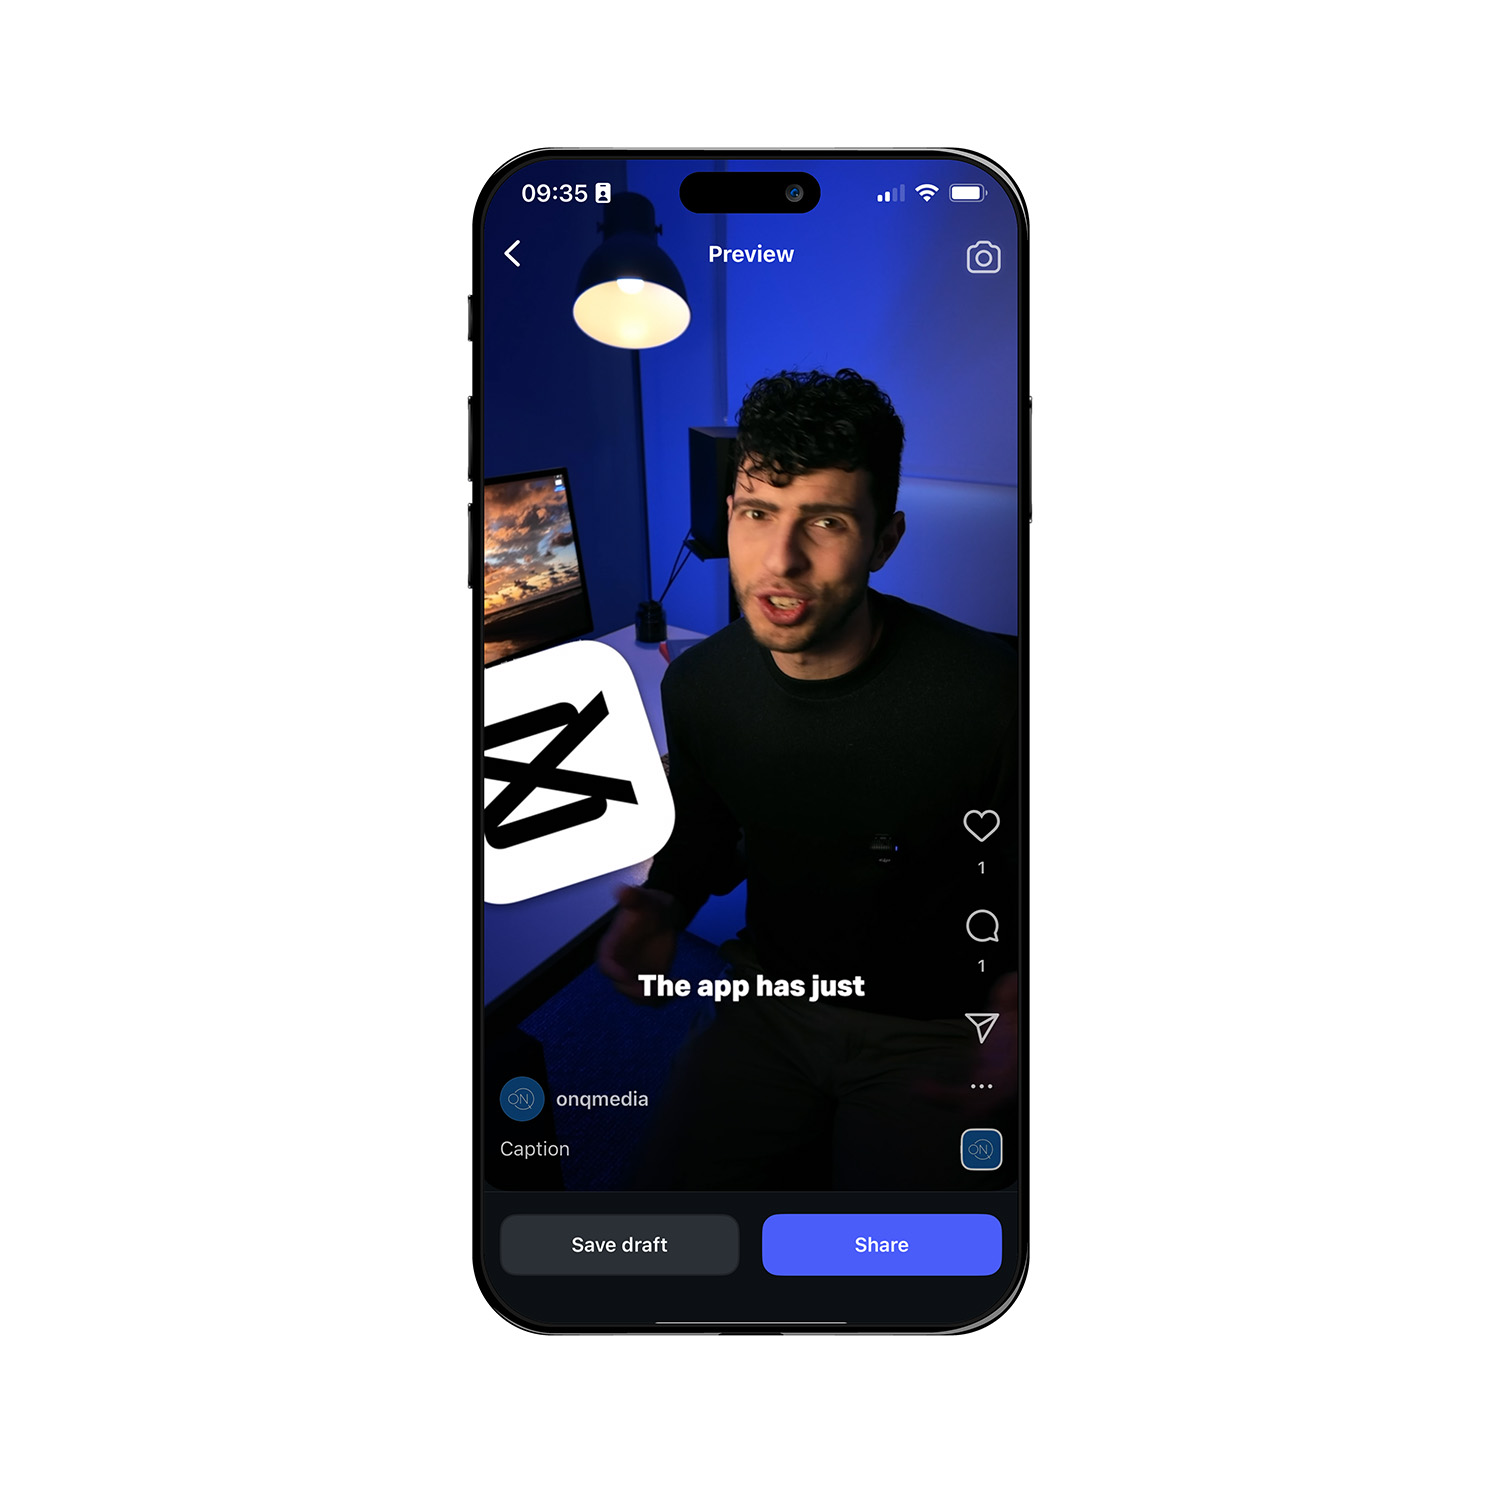
The other issue with both these platforms compared to YouTube, is the user interface elements are overlayed. TikTok, being the original short-form video app, started this trend by placing titles, action buttons and captions (descriptions) over the video, rather than around it.
This means you need to be careful how your content is framed otherwise parts of it may not be completely visible.
When creating content on Instagram or TikTok’s editor, it’s easy to preview the reel to ensure titles and content does not clash with the onscreen interface elements, but how about when using other editing software?
Thankfully, there’s a market for Instagram and TikTok overlays which can be used as a guide when editing on a computer or phone.
My friend Henry Sheanan has some Instagram guides which you can find here, but it’s also easy to source these from many places online.
Point being, use these guides when creating content for reels. The last thing you want to do is upload your video to find your titles have gone off-screen!
VIDEO SETTINGS
Unlike YouTube, Reels on both Instagram and TikTok are fairly standardised. They all display exactly the same way, which means the settings between both don’t need any tweaking.
For both platforms you want to upload a file that is at least 1080 x 1920 pixels (this will be a 9:16 aspect ratio). You can upload something larger but it will be down-converted.
The file format should be a .MP4 for maximum compatibility.
Finally, the frame rate or amount of frames per second, is also fairly irrelevant. Both platforms cap footage at 30fps. If you shoot in a lower frame rate such as 25fps (like we mostly do in Australia) or 24fps (if you’re aiming for ‘cinema’), these should remain unchanged. However, if you’re a 60fps person (the default on iPhones which looks more ‘lifelike’), it will be down-converted to 30fps upon upload.
CAPTIONS / SUBTITLES
Another difference between long-form YouTube and short-form platforms like Instagram and TikTok is that for short-form, most people tend to watch videos without the sound turned on.
These platforms also don’t have automatically generated captions like YouTube, which users can toggle.
Therefore creators often add captions either in the platform’s native editors, or on other software beforehand.
Thankfully even professional programs like DaVinci Resolve on a Mac or PC now have automatic caption generation and the ability to animate these subtitles onto videos. Other smartphone / consumer apps like CapCut have been able to do this for a while.
However, please be aware CapCut has recently changed their terms of service to effectively ‘own’ their users content.
The bottom line here is don’t assume people will watch your content with sound. Build in captions beforehand and then use the guides mentioned above to ensure they won’t get cut off.
HIGH QUALITY UPLOADS
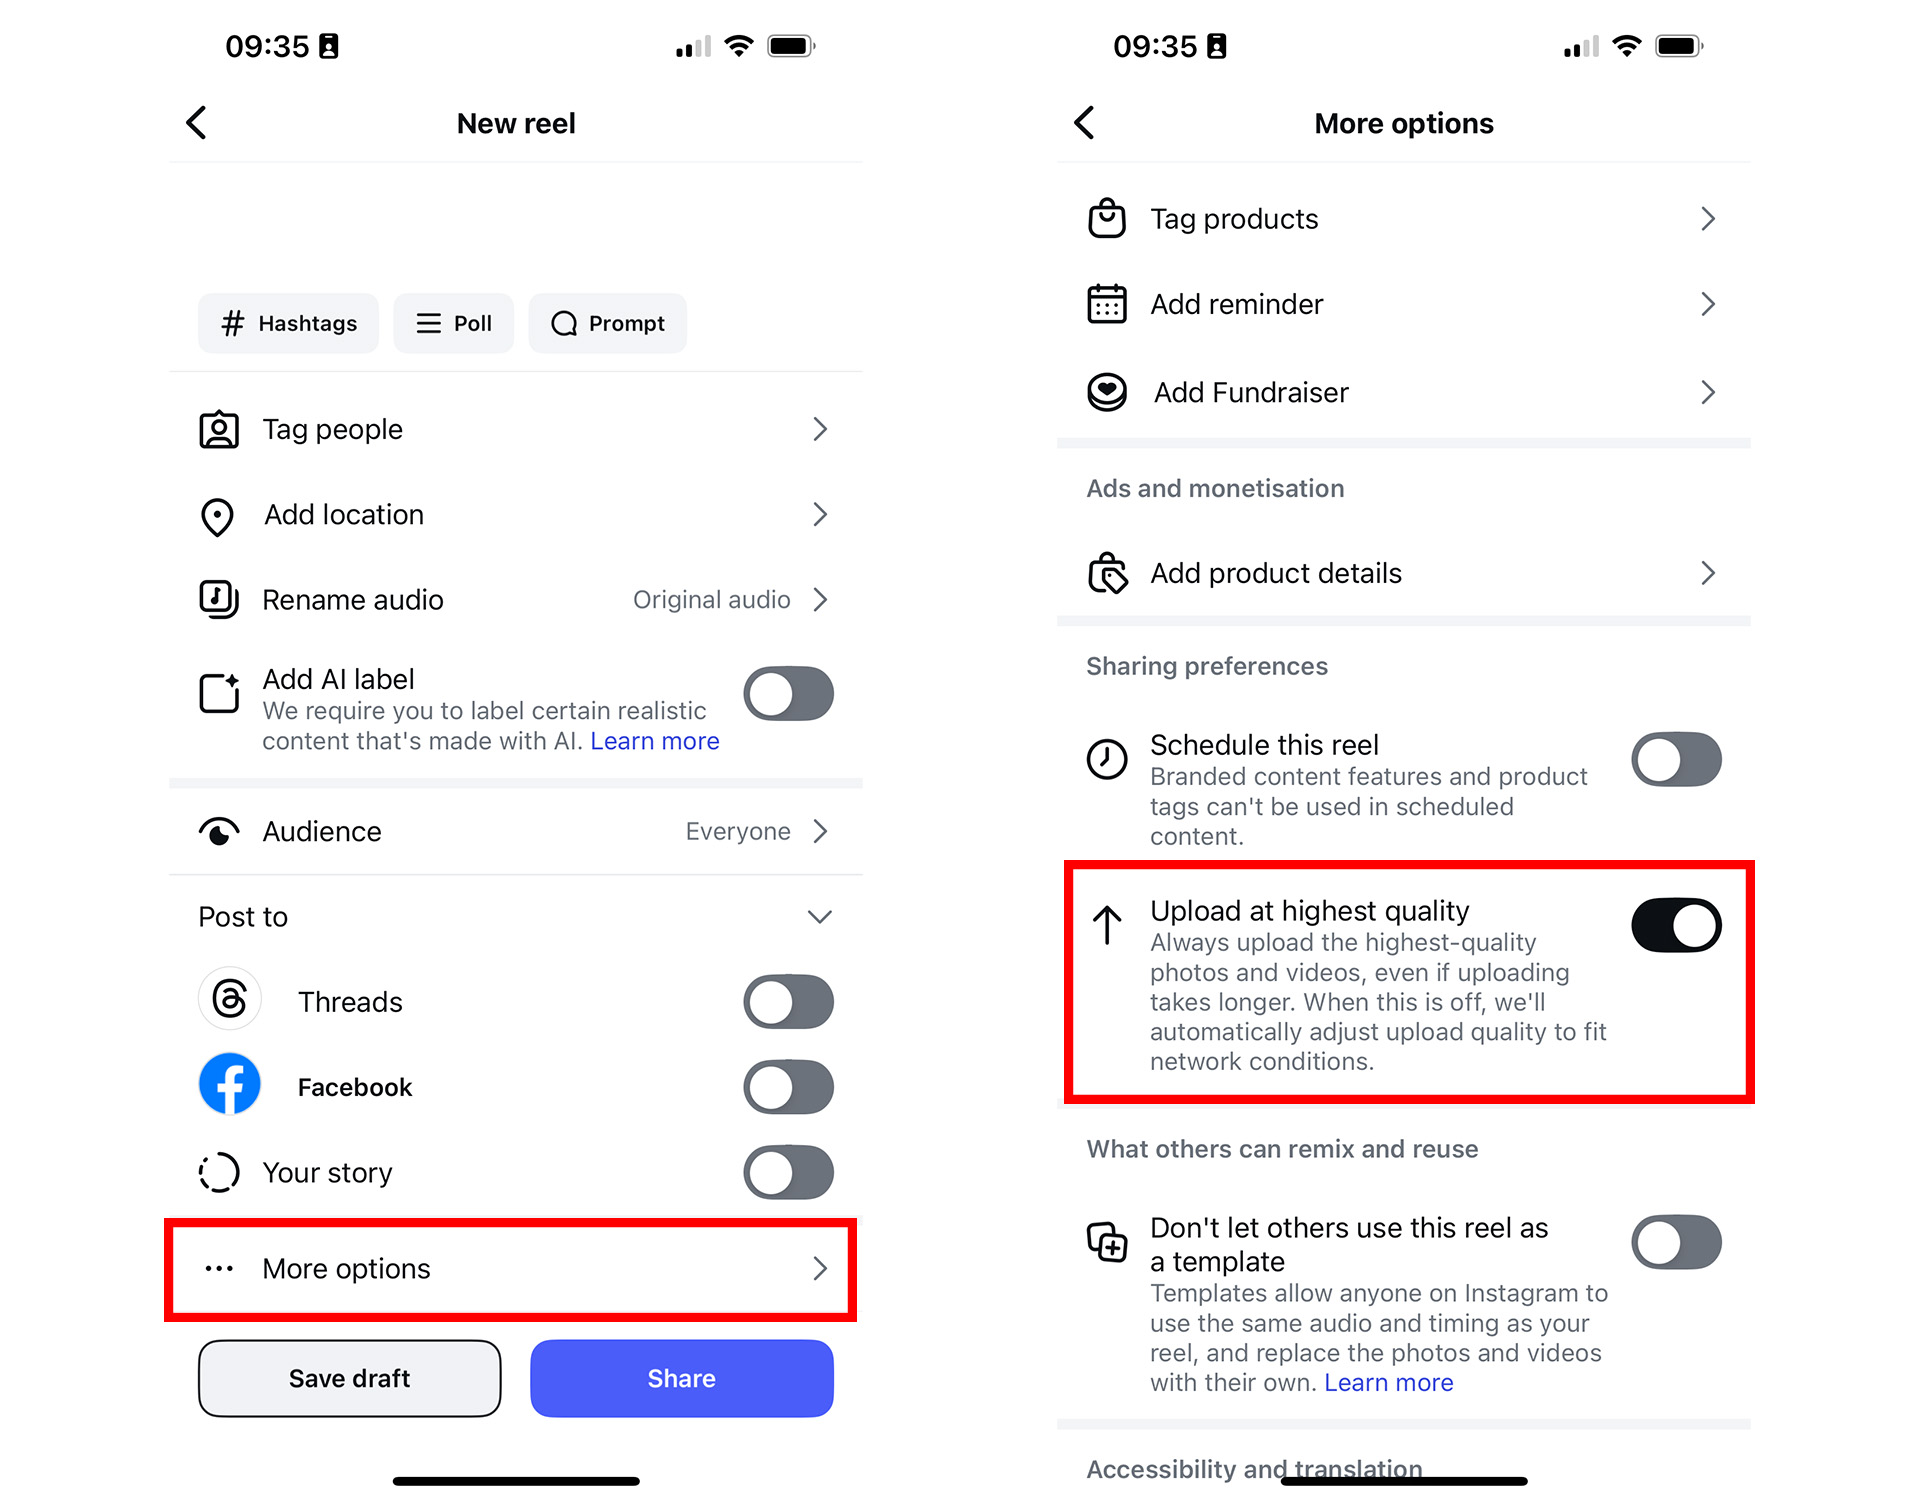
Both Instagram and TikTok both have toggle switches which allow you to upload your reels at the highest quality. Failing to select this will result in lower quality uploads which, after all our hard work, is NOT what we want!
For Instagram, you can find the toggle under Settings (the hamburger icon in the top right of your profile) > Media Quality > Upload at highest quality.
Once turned on, this setting should persist for all of your uploads, but you can also find it under ‘More Options’ when uploading a Reel just to make sure it’s turned on.
TikTok is very similar (although we all know who copied who). On your upload page, you can also find it under More Options > Allow high quality uploads.
This setting should then persist in future uploads, but it’s best to always check beforehand.
RECAP
- 9:16 Aspect Ratio
- Recommended 1080 x 1920px at least
- .MP4 Format
- Video is capped at 30fps but does not require any re-converting from the user’s end
- Add captions before uploading
- Turn Upload at highest quality setting on for both Instagram and TikTok
Disclaimer
None of these articles are written or assisted by AI. I really enjoy the process of writing (I’m now up to 1.5 million words in my own personal writings) and am happy to spend the time to crafting these guides. Please let me know if you have any feedback or would like me to cover something in a future article.
Thanks to my friends and family for their continued support in my dreams. It makes all the difference.
Much Love,
Matt.
Creative Director @ On Q Media.